Here is a list of main deliverables of the project; their details are given in the subsequent sections.
- Product
- Documentation
- Product Demo
Deliverable: Executable
- Should be an executable jar file.
- Should be i.e., it can be used by end-usersreleasable. While some features may be scheduled for later versions, the features in v1.4 should be good enough to make it usable by at least some of the target users.
- Also note the following constraint:
Deliverable: Source code
- Should match v1.4 deliverables i.e., executable, docs, website, etc.
- To be delivered as a Git repo. Ensure your GitHub team repo is updated to match the executable.
Deliverable: User Guide (UG)
In UG/DG, using hierarchical section numbering and figure numbering is optional (reason: it's not easy to do in Markdown), but make sure it does not inconvenience the reader (e.g., use section/figure title and/or hyperlinks to point to the section/figure being referred to). Examples:
In the section Implementation given above ...
CS2103T does not require you to indicate author name of DG/UG sections (CS2101 requirements may differ). We recommend (but not require) you to ensure that the code dashboard reflect the authorship of doc files accurately.
The main content you add should be in the
docs/UserGuide.mdfile (for ease of tracking by grading scripts).Should cover all current features.
Ensure those descriptions match the product precisely, as it will be used by peer testers (inaccuracies will be considered bugs).OPTIONAL You can also cover future features. Mark those as
Coming soon.It is not necessary for the UG to contain every nitty-gritty detail about the product behavior. Some rarely needed information can be omitted from the UG, if the user is expected to know that information already or if the user is kept informed in other ways. For example, if a certain invalid input is unlikely to be used anyway, it is fine to not specify it in the UG, as long as the product is able to give an informative error message when that invalid input is used.
Beware of overusing screenshots. While it is good to have screenshots in the UG, note that they are hard to maintain. For example, if a future version changes the GUI slightly, it will require all your screenshots to be updated. Here are some tips:
- In general, don't use more screenshots than necessary.
- In some cases, you may want to crop the screenshot to show only the elements being discussed. That way, the screenshot doesn't need to be updated when other parts of the GUI is modified in a later version.
- Don't use a higher resolution than necessary as it can increase the UG file size unnecessarily.
Also note the following constraint:
Deliverable: Developer Guide (DG)
FAQ: How detailed the DG should be? Do we have to describe every feature/component?
Answer:
- The DG is primarily meant to help future developers. Therefore, decide based on how the inclusion/exclusion affects that target audience.
- That said, the DG is also used for evaluating your ability to write developer documentation. If the above criterion doesn't result in enough content to showcase those skills, you can judiciously add more content, to describe proposed features, design alternatives, less important features etc.
- The main content you add should be in the
docs/DeveloperGuide.mdfile (for ease of tracking by grading scripts).
If you use PlantUML diagrams, commit the diagrams as.pumlfiles in thedocs/diagramsfolder. - Should match the v1.4 implementation.
- Ensure the 'Acknowledgements' section is accurate: It should cite all ideas/code/documentation you reused. If you reused/adapted or even drew inspiration from other projects (including projects by past/current students), mention the extent of reuse and give hyperlinks to the original projects' GitHub page, UG, DG, etc. Examples:
- OPTIONAL You can include proposed implementations of future features.
- Include an appendix named Instructions for Manual Testing, to give some guidance to the tester to chart a path through the features, and provide some important test inputs the tester can copy-paste into the app.
- Cover all user-testable features but no need to cover existing AB3 features if you did not touch them.
- No need to give a long list of test cases including all possible variations. It is upto the tester to come up with those variations.
- Information in this appendix should complement the UG. Minimize repeating information that are already mentioned in the UG.
- Inaccurate instructions will be considered bugs.
- We highly recommend adding an appendix named
Effortthat evaluators can use to estimate the total project effort.- Keep it brief (~1 page)
- Explain the difficulty level, challenges faced, effort required, and achievements of the project.
- If a significant part (e.g., more than 5%) of the effort was saved through reuse, mention what you reused and how it affected the effort e.g., the feature X is implemented using library Foo -- our work on adapting Foo to our product is contained in class
FooAdapter.java. - Use AB3 as a reference point e.g., you can explain that while AB3 deals with only one entity type, your project was harder because it deals with multiple entity types.
DG Tips
- Aim to showcase your documentation skills. The primary objective of the DG is to explain the implementation to a future developer, but a secondary objective is to serve as evidence of your ability to document deeply-technical content using prose, examples, diagrams, code snippets, etc. appropriately. To that end, you may also describe features that you plan to implement in the future, even beyond v1.4 (hypothetically).
For an example, see the description of the undo/redo feature implementation in the AddressBook-Level3 developer guide. - Use multiple UML diagram types. Following from the point above, try to include UML diagrams of multiple types to showcase your ability to use different UML diagrams.
- Diagramming tools:
- AB3 uses PlantUML (see the guide Using PlantUML @SE-EDU/guides for more info).
- You may use any other tool too (e.g., PowerPoint). But if you do, note the following:
- Choose a diagramming tool that has some 'source' format that can be version-controlled using git and updated incrementally (reason: because diagrams need to evolve with the code that is already being version controlled using git). For example, if you use PowerPoint to draw diagrams, also commit the source PowerPoint files so that they can be reused when updating diagrams later.
- Use the same diagramming tool for the whole project, except in cases for which there is a strong need to use a different tool due to a shortcoming in the primary diagramming tool. Do not use a mix of different tools simply based on personal preferences.
- Can i.e., automatically reverse engineered from the Java codeIDE-generated UML diagrams be used in project submissions? Not a good idea. Given below are three reasons each of which can be reported by evaluators as 'bugs' in your diagrams, costing you marks:
- They often don't follow the standard UML notation (e.g., they add extra icons).
- They tend to include every little detail whereas we want to limit UML diagrams to important details only, to improve readability.
- Diagrams reverse-engineered by an IDE might not represent the actual design as some design concepts cannot be deterministically identified from the code. e.g., differentiating between multiplicities
0..1vs1, composition vs aggregation
- AB3 uses PlantUML (see the guide Using PlantUML @SE-EDU/guides for more info).
- Keep diagrams simple. The aim is to make diagrams comprehensible, not necessarily comprehensive.
Ways to simplify diagrams:- Omit less important details. Examples:
- a class diagram can omit minor utility classes, private/unimportant members; some less-important associations can be shown as attributes instead.
- a sequence diagram can omit less important interactions, self-calls.
- Omit repetitive details e.g., a class diagram can show only a few representative ones in place of many similar classes (note how the AB3 Logic class diagram shows concrete
*Commandclasses using a placeholderXYZCommand). - Limit the scope of a diagram. Decide the purpose of the diagram (i.e., what does it help to explain?) and omit details not related to it. In particular, avoid showing lower-level details of multiple components in the same diagram unless strictly necessary e.g., note how the this sequence diagram shows only the detailed interactions within the Logic component i.e., does not show detailed interactions within the model component.
- Break diagrams into smaller fragments when possible.
- If a component has a lot of classes, consider further dividing into sub-components (e.g., a Parser sub-component inside the Logic component). After that, sub-components can be shown as black-boxes in the main diagram and their details can be shown as separate diagrams.
- You can use
refframes to break sequence diagrams to multiple diagrams. Similarly,rakes can be used to divide activity diagrams.
- Stay at the highest level of abstraction possible e.g., note how this sequence diagram shows only the interactions between architectural components, abstracting away the interactions that happen inside each component.
- Use visual representations as much as possible. E.g., show associations and navigabilities using lines and arrows connecting classes, rather than adding a variable in one of the classes.
- For some more examples of what NOT to do, see here.
- Omit less important details. Examples:
- Integrate diagrams into the description. Place the diagram close to where it is being described.
- Use code snippets sparingly. The more you use code snippets in the DG, and longer the code snippet, the higher the risk of it getting outdated quickly. Instead, use code snippets only when necessary and cite only the strictly relevant parts only. You can also use pseudo code instead of actual programming code.
- Resize diagrams so that the text size in the diagram matches the the text size of the main text of the diagram. See example.
Deliverable: Product Website
When setting up your team repo, you would be configuring the GitHub Pages feature to publish your documentation as a website.
Website Home page
- Update to match your product.
Website Ui.png
- Ensure the
Ui.pngmatches the current product
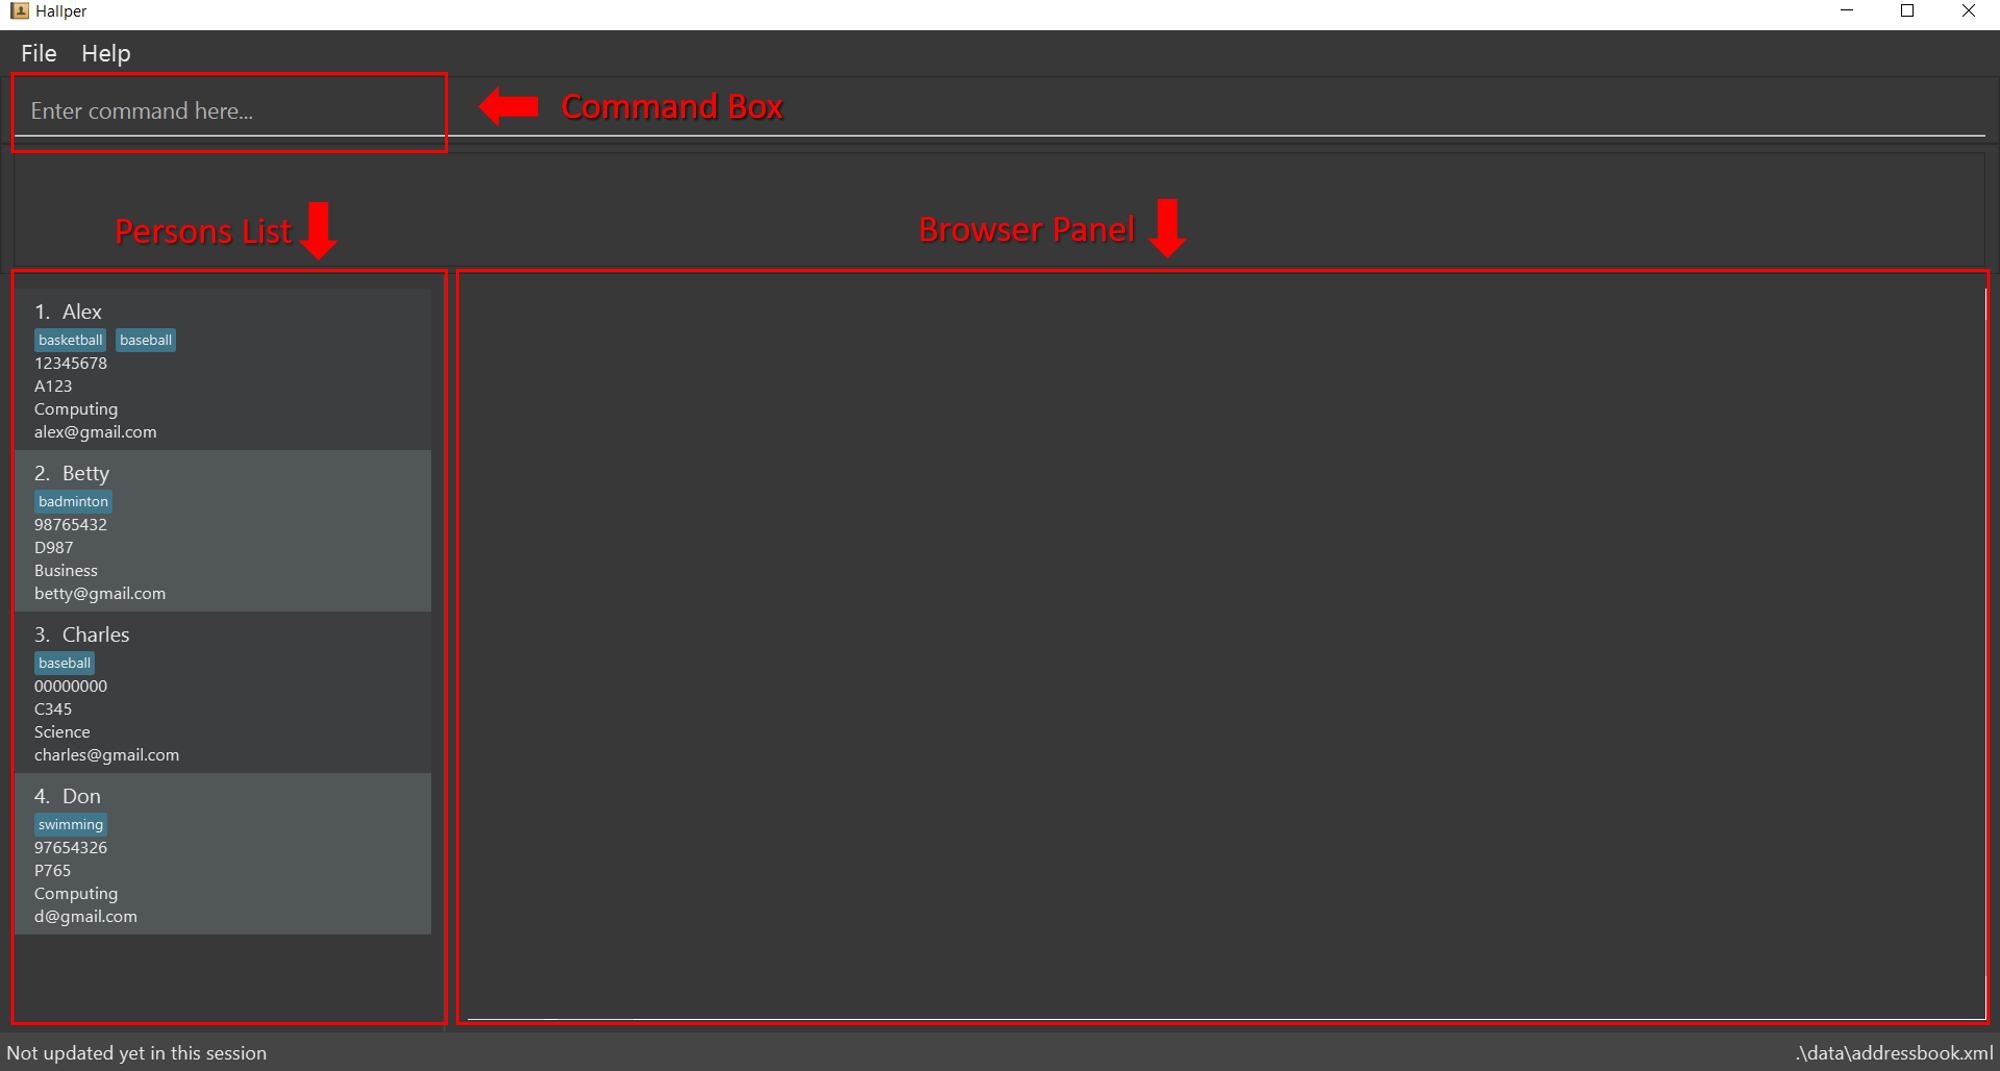
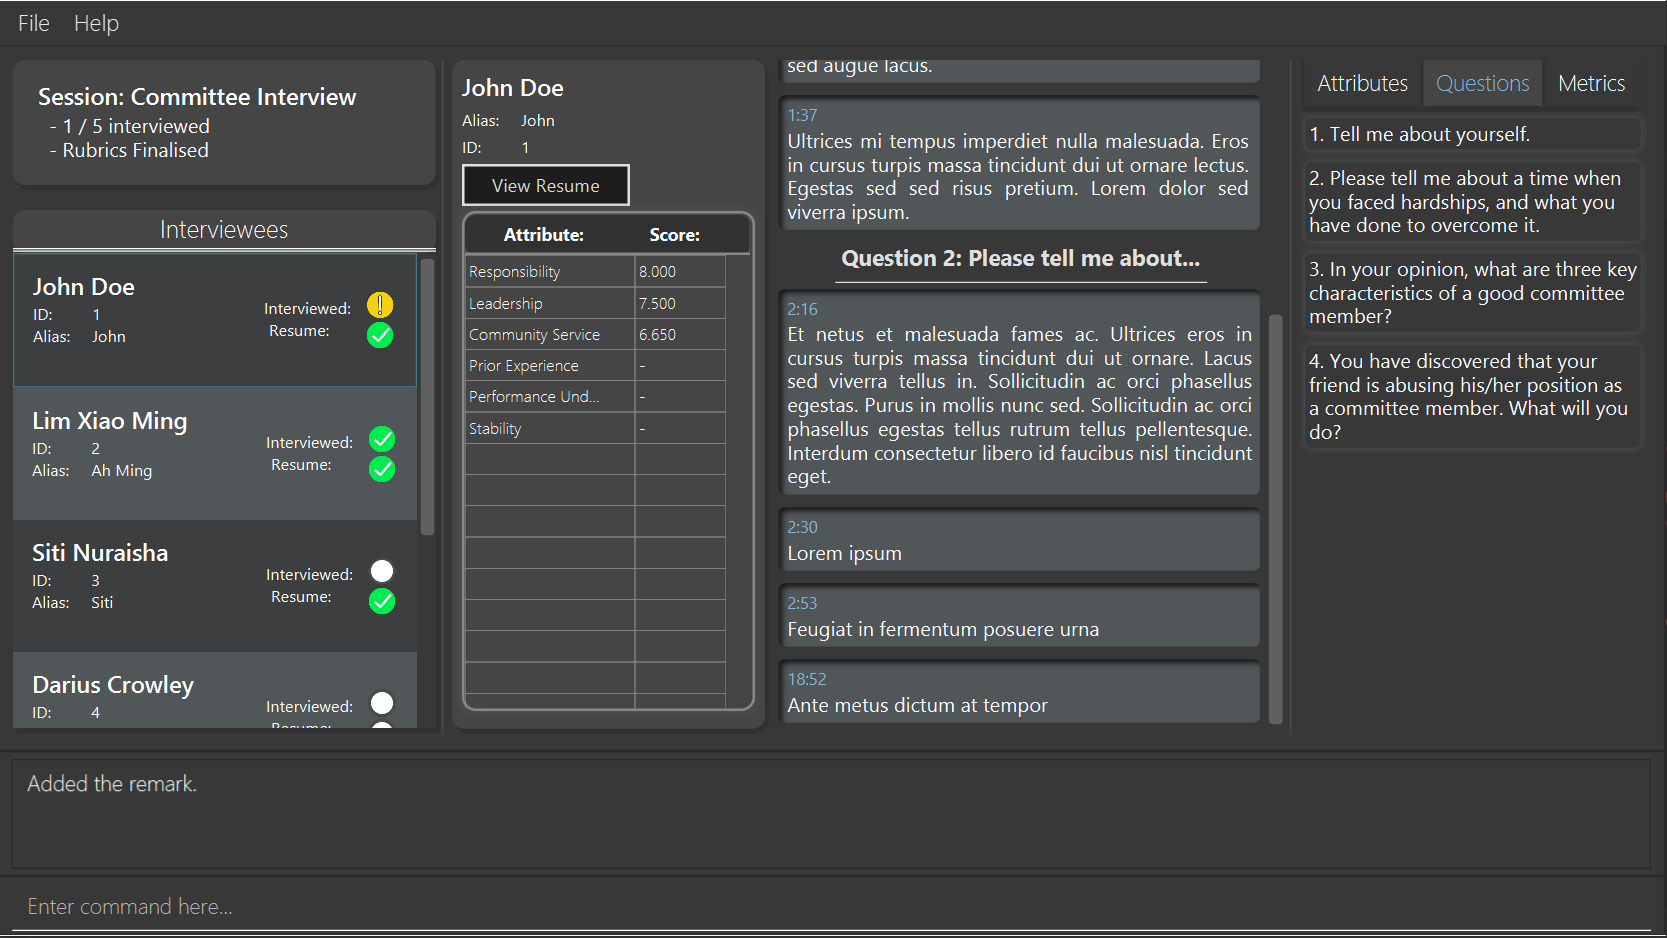
Some common sense tips for a good product screenshot
Ui.png should showcase your product in its full glory.
- Populate the product with realistic data before taking the screenshot. For example,
- if the UI is supposed to show profile photos, use real profile photos instead of dummy placeholders.
- if the UI shows text, don't use trivial/garbage values such as
test 123or values a typical user is unlikely to use.
- Use data that make the product look good e.g., if the product doesn't have nice line wrapping for long inputs/outputs, don't use such inputs/outputs for the screenshot.
- Avoid too many blank areas. If you show the product in a well-populated state there shouldn't be largely blank areas that could be filled up instead.
- Choose a state that showcases the main features of the product i.e., the login screen is not usually a good choice.
- Take a clean screenshot with a decent resolution. Some screenshot tools can capture a specified window only. If your tool cannot do that, make sure you crop away the extraneous parts captured by the screenshot.
- Avoid annotations (arrows, callouts, explanatory text etc.); it should look like the product is in use for real.
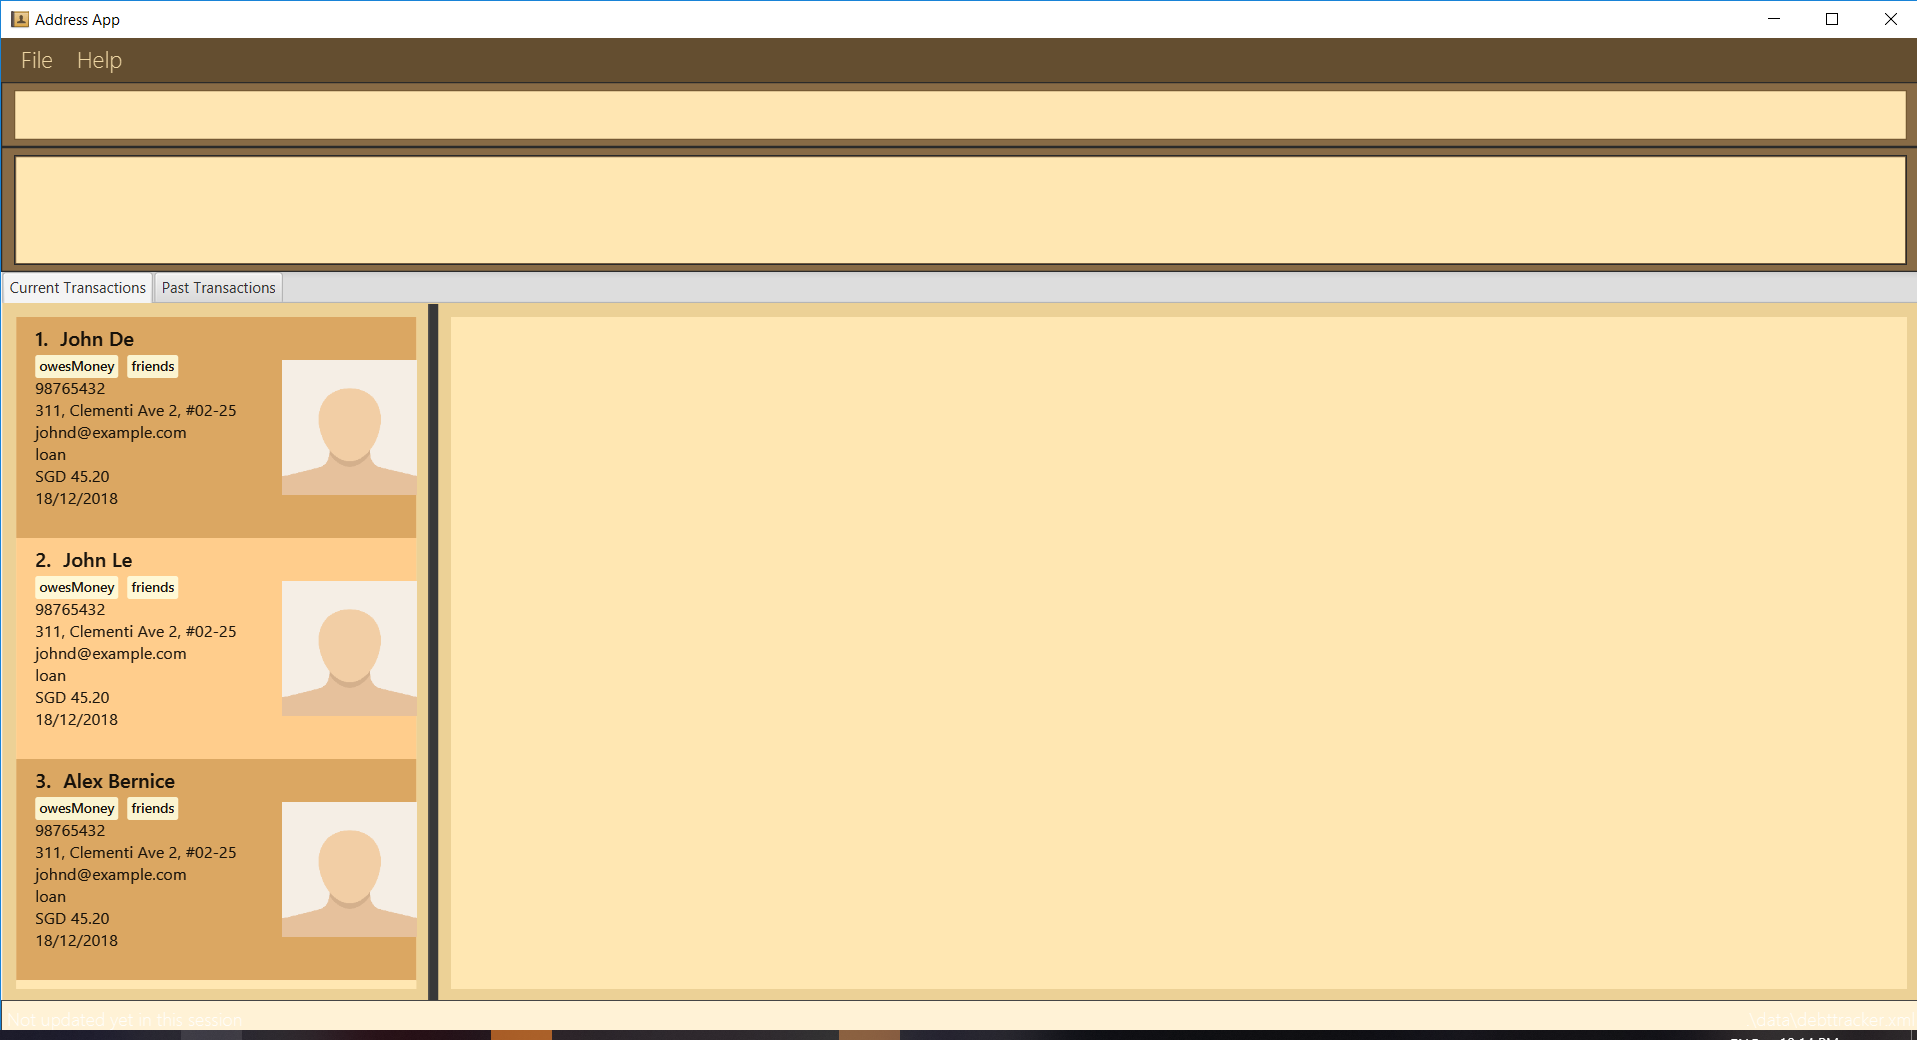
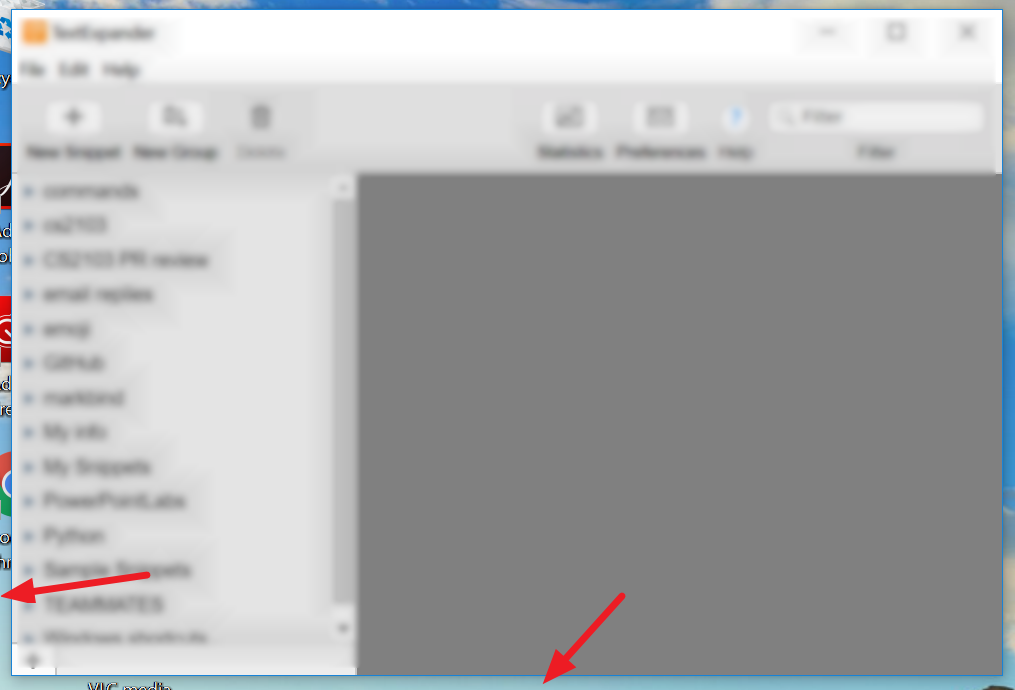
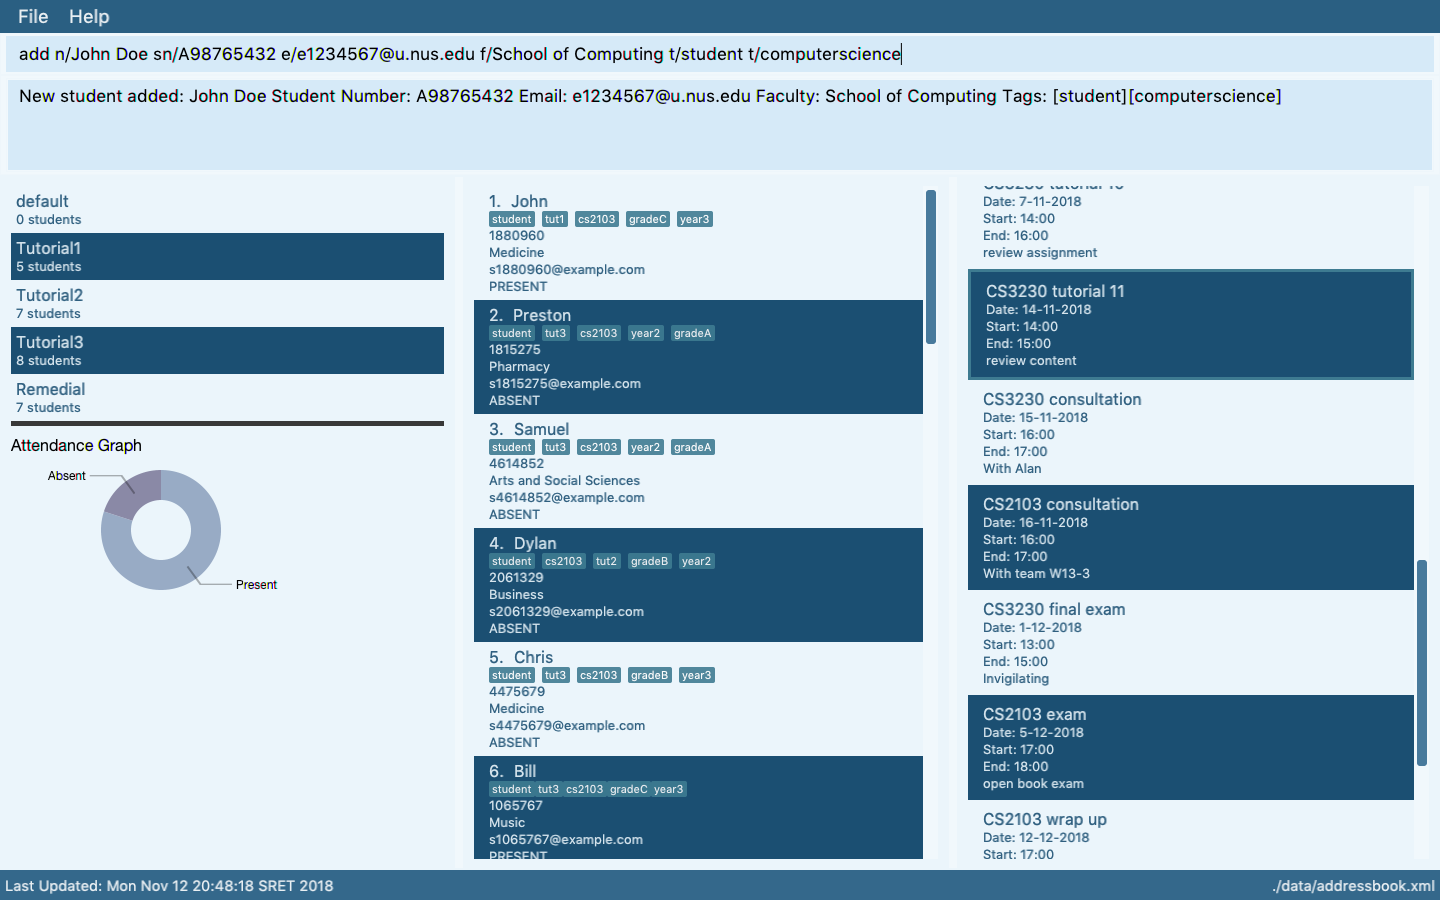
Examples
Reason: Distracting annotations.
Reason: Not enough data. Should have used real profile pictures instead of placeholder images.
Reason: screenshot not cropped cleanly (contains extra background details)
Website AboutUs Page
- Use a suitable profile photo.
The purpose of the profile photo is for the reader to identify you. Therefore, choose a recent individual photo showing your face clearly (i.e., not too small) -- somewhat similar to a passport photo. Given below are some examples of good and bad profile photos.
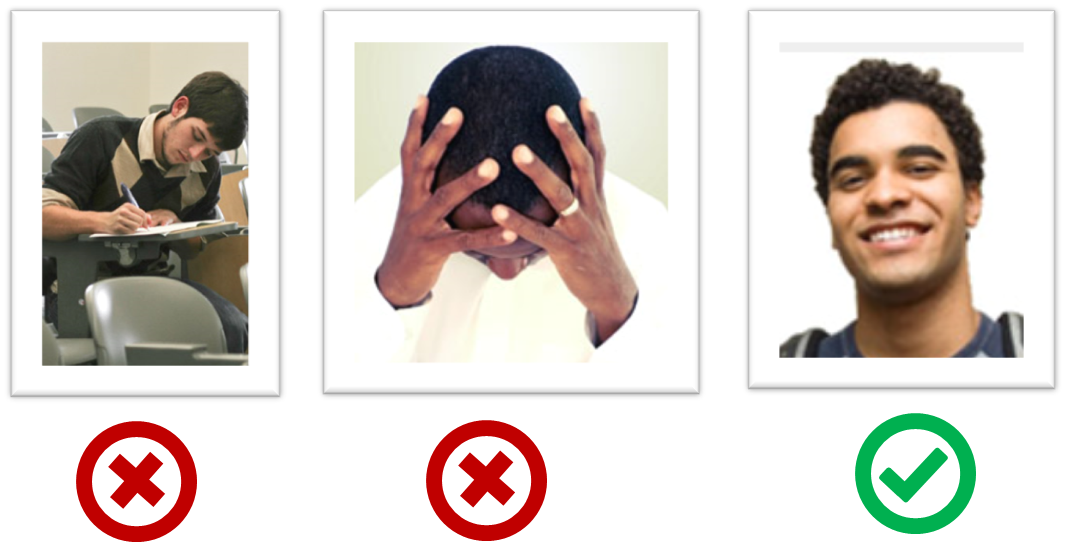
If you are uncomfortable posting your photo due to security reasons, you can post a lower resolution image so that it is hard for someone to misuse that image for fraudulent purposes. If you are concerned about privacy, you may use a placeholder image in place of the photo in module-related documents that are publicly visible.
- Include a link to each person's PPP page.
- Team member names match full names used by LumiNUS.
Website UG (Web Page)
- Should match the submitted PDF file.
Website DG (Web Page)
- Should match the submitted PDF file.
Deliverable: Project Portfolio Page (PPP)
At the end of the project each student is required to submit a Project Portfolio Page.
PPP Objectives
- For you to use (e.g. in your resume) as a well-documented data point of your SE experience
- For evaluators to use as a data point for evaluating your project contributions
PPP Sections to include
- Overview: A short overview of your product to provide some context to the reader. The opening 1-2 sentences may be reused by all team members. If your product overview extends beyond 1-2 sentences, the remainder should be written by yourself.
- Summary of Contributions --Suggested items to include:
- Code contributed: Give a link to your code on tP Code Dashboard. The link is available in the Project List Page -- linked to the icon under your profile picture.
- Enhancements implemented: A summary of the enhancements you implemented.
- Contributions to the UG: Which sections did you contribute to the UG?
- Contributions to the DG: Which sections did you contribute to the DG? Which UML diagrams did you add/updated?
- Contributions to team-based tasks
- Review/mentoring contributions: Links to PRs reviewed, instances of helping team members in other ways.
- Contributions beyond the project team:
- Evidence of helping others e.g. responses you posted in our forum, bugs you reported in other team's products,
- Evidence of technical leadership e.g. sharing useful information in the forum
Keep in mind that evaluators will use the PPP to estimate your project effort. We recommend that you mention things that will earn you a fair score e.g., explain how deep the enhancement is, why it is complete, how hard it was to implement etc.
- OPTIONAL Contributions to the Developer Guide (Extracts): Reproduce the parts in the Developer Guide that you wrote. Alternatively, you can show the various diagrams you contributed.
- OPTIONAL Contributions to the User Guide (Extracts): Reproduce the parts in the User Guide that you wrote.
PPP Format
- File name (i.e., in the repo):
docs/team/githbub_username_in_lower_case.mde.g.,docs/team/goodcoder123.md - Follow the example in the AddressBook-Level3
Don't take PDF conversion lightly: To convert the UG/DG/PPP into PDF format, go to the generated page in your project's github.io site and use this technique to save as a pdf file. Using other techniques can result in poor quality resolution (will be considered a bug) and unnecessarily large files.
The PDF versions of the UG/DG/PPP should be usable by the target readers, even if not as neat/optimized as the Web versions. For example, margins and page breaks need not be optimized but they should not hinder the reader either. Assume some will occasionally choose the PDF version over the Web version e.g, for printing, offline viewing, annotating etc.
Ensure hyperlinks in the pdf files work. Your UG/DG/PPP will be evaluated using PDF files during the PE. Broken/non-working hyperlinks in the PDF files will be considered as bugs and will count against your project score. Again, use the conversion technique given above to ensure links in the PDF files work.
Try the PDF conversion early. If you do it at the last minute, you may not have time to fix any problems in the generated PDF files (such problems are more common than you think).
PPP Page Limit
| Content | Recommended | Hard Limit |
|---|---|---|
| Overview + Summary of contributions | 0.5-1 | 2 |
| [Optional] Contributions to the User Guide | 1 | |
| [Optional] Contributions to the Developer Guide | 3 |
- The page limits given above are after converting to PDF format. The actual amount of content you require is actually less than what these numbers suggest because the HTML → PDF conversion adds a lot of spacing around content.
Deliverable: Demo
- Record a demo of all the product features, in a reasonable order. Some options:
- Screen record each feature and tie it up (see the "Suggested tools" below for tool options).
- Schedule + record a zoom meeting within the team, where you share your screens and do the demo.
- The quality of the demo will not affect marks as long as it serves the purpose (i.e., demonstrates the product features). Hence, don't waste too much time on creating the video.
- Audio explanations are strongly encouraged (but not compulsory) -- alternatively, you can switch between slides and the app to give additional explanations.
- Annotations and other enhancements to the video are optional (those will not earn any extra marks).
- All members taking part in the demo video is encouraged but not compulsory.
- File name:
[TEAM_ID][product Name].mp4e.g.[CS2103-T09-2][ContactsPlus].mp4 (other video formats are acceptable but use a format that works on all major OS'es). - File size: Recommended to keep below 200MB. You can use a low resolution as long as the video is in usable quality.
- Submission: Submit to LumiNUS (different folder).
- Deadline: 2 days after the main deadline
- Suggested tools:
Demo Duration
- Strictly 18 minutes for a 5-person team, 15 minutes for a 4-person team, 21 minutes for a 6-person team. Exceeding this limit will be penalized.
Demo Target audience
- Assume you are giving a demo to a higher-level manager of your company, to brief them on the current capabilities of the product. This is the first time they are seeing the new product you developed. The actual audience are the evaluators (the team supervisor and another tutor).
Demo Scope
- Start by giving an overview of the product so that the evaluators get a sense of the full picture early. Include the following:
- What is it? e.g., FooBar is a product to ensure the user takes frequent standing-breaks while working.
- Who is it for? e.g., It is for someone who works at a PC, prefers typing, and wants to avoid prolonged periods of sitting.
- How does it help? Give an overview of how the product's features help to solve the target problem for the target user
Here is an example:
Hi, welcome to the demo of our product FooBar. It is a product to ensure the user takes
frequent standing-breaks while working.
It is for someone who works at a PC, prefers typing, and wants to avoid prolonged periods
of sitting.
The user first sets the parameters such as frequency and targets, and then enters a
command to record the start of the sitting time, ... The app shows the length of the
sitting periods, and alerts the user if ...
...
- There is no need to introduce team members or explain who did what. Reason: to save time.
- Present the features in a reasonable order: Organize the demo to present a cohesive picture of the product as a whole, presented in a logical order.
- No need to cover design/implementation details as the manager is not interested in those details.
Demo Structure
- Demo the product using the same executable you submitted
- Use a sufficient amount of
Mr aaais not a realistic person namerealistic demo data. e.g at least 20 data items. Trying to demo a product using just 1-2 sample data creates a bad impression.
Demo Tips
- Plan the demo to be in sync with the impression you want to create. For example, if you are trying to convince that the product is easy to use, show the easiest way to perform a task before you show the full command with all the bells and whistles.